
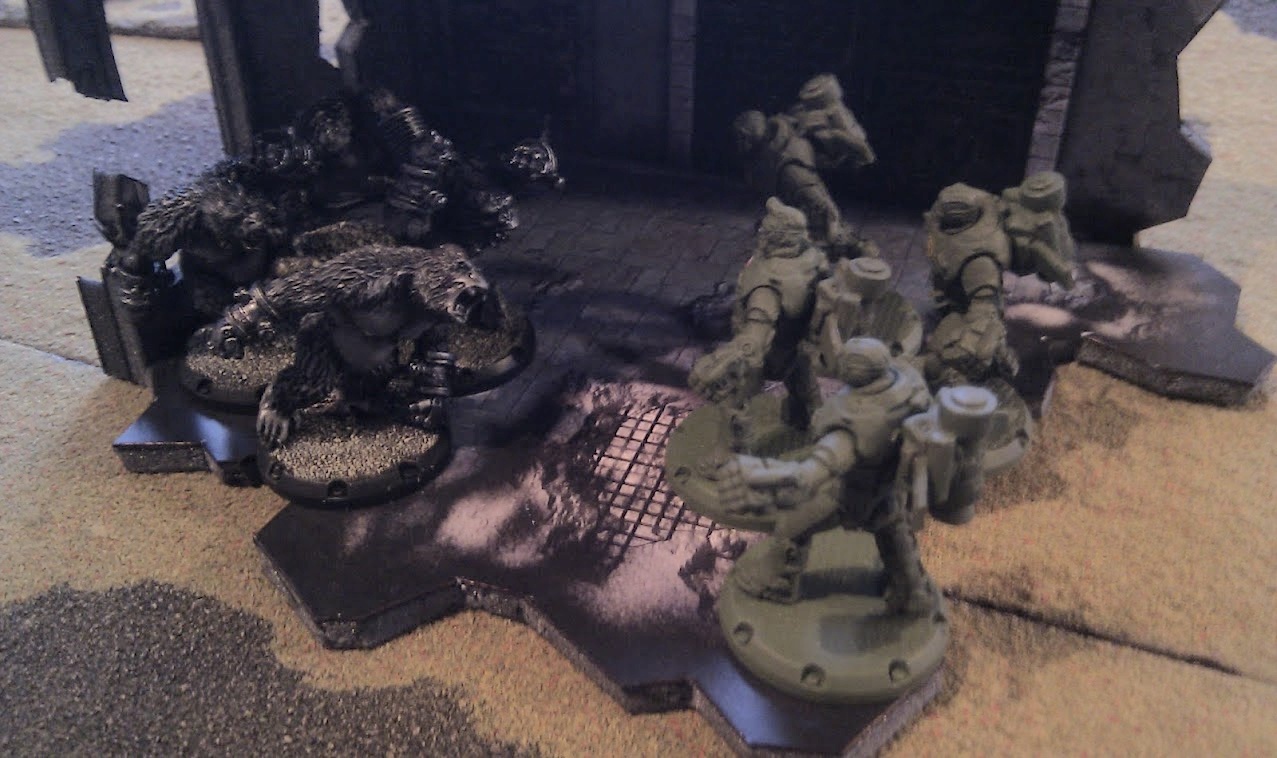
Parts of the American deployment zone.
This Monday Anders and I had scheduled a game night and were plannig for two games of Dust Warfare and a test of the Judge Dredd miniature game (it's free!!). We met up around five and after a quick game of Judge Dredd (more on that later, but great fun!) we started putting together our Dust Warfare armies. As Anders recently bought the revised core set as well as some zombies and gorillas for the Axis there was more to play with this time around and we ended up with about 220 points each.
I nominated a ruin in the middle of the table and a shipping container close to my deployment zone as my two take and hold objectives. I planned to advance to the ruin quickly and hold it while staying close to the container to be able to return to it towards the end of the game. Anders chose another ruin and container near the middle of the table (unbeknowst to me of course).

Deployment. X are my objectives, Y are Anders objectives.
As I had more units than the Axis I could hold off and wait to see where he put some of his key units. He had his Ludvig on my left flank with a commanding field of fire. I had my light Wildfire walker opposing it which didn't really match up, but then Anders deployed his zombies on the same flank and the Wildfire had founds its target. On my right flank was the Hans and in the middle his heavy infantry, command squad and apes. I had my Honey facing the Hans as I thought it would be able to take it out while the Blackhawk lurked in the middle, ready to head in either direction as needed. Most of my squads were located in the middle of the table with only my BBQ Squad flanking on the right side where they had lots of cover to advance behind. I put the Hammers, lead by Rhino, behind a container to be used to counter-charge against any apes or zombies that closed on my lines.
Turn 1

The Axis line (actually before deployment was complete).
During the first turn I moved the Recon Rangers and Combat Rangers near and into ruined objective building while my other squads moved slowly forwards. My command squad and Hammers hanged back while the BBQ and light walkers raced forward (if the Honey failed I thought the BBQ might be able to torch the Axis walker) while the Ranger Weapon squad covered them. Anders moved his troops forward as well with his apes coming scaringly close to my lines! The zombies raced out into the open, making a pretty target for my Wildfire's quad .50 cals I thought. There were a couple of fire exchanges, the Ludvig shot the Wildfire and the Honey shot the Hans, but no damage was done.
Turn 2
Heavyweight face-off!
During the first turn neither of us had given any orders during the command phase but things were looking a lot more critical in the second turn, with four angry gorillas barreling down towards the American lines! I managed to win the initative but felt that I wouldn't benefit from issuing orders during the command phase so only moved one of my squads a little. Anders on the other hand used his phase to advance his Sturmpionieren and Heavy Flak Grenadiers. Going first in the unit phase meant I had the chance to take the fight to the apes! Rhino lead his Hammers as they used their rocket packs to jump over the container (I think Anders had forgot they were there!) and straight on top of the apes! I decided to use Rhino's berserk ability here, allowing me to reroll misses, but still just ended up with four hits. Well, enough to either kill Marcus or decimate the squad I thought only to have Anders tell me that Marcus has six hits! Argh! In return the apes inflicted three hits on Rhino. This didn't look good...

On my left flank the Wildfire opened up on the zombies but failed to inflict a single hit! The Recon Rangers in the ruins climbed up to the second floor and opened up on the Heavy Laser Grenadiers that were huddling behind an old tank trap and they managed to bring one of the lumbering men down. My Honey again fired on the Hans but missed (of course) and as the driver frantically tried to recharge his phasers the Hans returned fire and blew the American light walker to bits! This was worrying as I didn't have much anti-armour capability nearby - the BBQ squad sure, but they only have a range of six inches! The zombies stormed towards the Wildfire! I knew that if they caught it it would be turned into so much scrap metal so used my reaction to simply run away. However, this just made it into a large target for the Ludvig who proceeded to blow it away. Only one walker left now and it was hiding behind some ruins! My command squad took their first hits as Anders advanced his Heavy Flak Grenadiers (nasty unit that!).
Turn 3

The right flank.
On turn three the initative went to the Axis and Anders used an order to keep the Hans away from the closing BBQ squad as well as positioning his Sturmpionieren better. I used my orders to regroup most of my troops as well as send a rocket towards the Hans... that missed. The apes put the beat down on the Hammers killing all of them. The Hans zeroed in on the Ranger Weapon squad and managed to kill a couple of them. The Ludvig fired on the Blackhawk and my last walker was no more. Things were looking dire as it was my turn to take action; I had both the apes and zombies knocking on my door, all my walkers were destroyed and the heavy infantry squad wiped out. And all I had managed was a single casualty! Drastic measures were needed!

It seemed like the only way I would be able to stop the apes were by utilising my command squad with their abundance of shotguns and flamethrowers. If I did that however I would leave them open to the Heavy Flak Grenadiers (not the Sturmpionieren luckily as they were suppressed). After some consideration (and looking up in the rules what happened if you lost your command section...) I decided that it was the only course of action left for me. The Hell Boys suddenly vaulted over their cover running full speed right in front of the lumbering gorillas and opened up with everything they got! The result was four huge smoking corpses... the smell of burned hair was overpowering. That was one threat down, but behind the ruins on the left flank the zombies were lurking. I realised that the Combat Ranger squad had line of fire to them and were in range to use their underslung grenade launchers. After a sustained fire action they had cleared the zombie threat as well! Phew! What had looked like a total steamrolling was suddenly turning into something more even.
Turn 4

Heavy Flak Grenadiers are nasty I tell you. Nasty!
Turn four consisted mostly of maneuvering. Anders won the initative and my command squad took some severe damage from the Heavy Flak Grenadiers, only leaving the two flamethrower operators. Ouch! His Sturmpionieren fired as well but failed to do any damage. The Ludvig started firing on the ruins where the Recon Rangers were hiding but they were too well protected. The Hans moved forward and killed two members of the BBQ squad. The Recon Rangers continued pouring fire onto the Heavy Laser Grenadiers, failing to do any damage but now with enough suppression to force them to retreat. The Ranger Weapon squad again fired on the Hans but missed. The BBQ squad moved back a little bit as they tried to lure the Hans back out. My Command Squad would be wiped out if they stayed where they were so I moved them far away from the Heavy Flak Grenadiers, out on the right flank.
Turn 5

Finally the Hans meets its doom!
Anders again got the initative on the fifth and final turn. The retreating Heavy Laser Grenadiers rallied and moved back towards the tanktrap they had occupied before. The Ludvig again fired on the Recon Rangers, not touching them. As my command squad has displaced the Heavy Flak Grenadiers searched for a new target and found it in the Combat Ranger Squad who lost two men to their fire. The Sturmpionieren fired at the BBQ squad but missed. Finally the Hans advanced on the decimated Command Squad but it came a bit too close and the two remaining troopers opened up with their flamethrowers, finally destroying the damn light walker! As Anders handed the dice over to me I considered my options; by now I knew which two building he had designated as objectives and his Heavy Flak Grenadiers and Sturmpionieren were in base contact with them.

I wouldn't be able to take out the heavy infantry but a lucky attack from the BBQ Squad might be able to get rid of the Command Squad. They charged forward and fired but the dice weren't with me and only one German perished. The Recon Rangers again fired on the Heavy Laser Grenadiers and in an astonishing stroke of luck I rolled hits on every single die! Anders rolled his armour rolls, but didn't roll well enough and the unit was completely wiped out! As the final act of the game my Ranger Weapon squad moved back into base contact with the objective container.
Aftermath
As the smoke cleared it was apparent to both sides that there was no clear winner here. Both forces had been severely decimated and they had both managed to reach their objectives. For all intents and purposes this was a draw, and a very close on at that. Counting up our respective casualties I ended up with 127 against Anders 116 meaning I had technically won the battle. Didn't feel like it though. Haha!
This game felt very different from our first foray into Dust Warfare. We have started to get the hang of the command phase and the limits of reactions and how to use them effectively. It was really cool to see the game swing as drastically as it did on turn three when I was more or less ready to pack it up. The short small arms ranges in Dust Warfare makes it easy to feel that your grunts aren't doing any damage but when close enough they can pour it on really well! It also goes to show that you often have to risk your squads to achieve success, in my case the command squad and to a certain extent the Hammers.

The Ludvig dominated the left flank as I didn't have anything to match its range.
The battle had it's fair share of cinematic moments which is something games with a reaction mechanic tend to have. Some highligts were the heroic American heavy infantry charging into the apes, only to get torn to pieces! The zombies flushing out the Wildfire so the Ludvig could get a clear shot of it. The Hans walking to close to the Hell Boys and getting torched (quite a surprise as it rounded the corner!). The Recon Rangers killing the Heavy Laser Grenadiers on the last turn. Lots of great moments! While the rules are simple we're still figuring out the flow of the game and how best to take advantage of the command phase and reactions. In this game I think Anders used his command phase more effectively while I rarely found use for it beyond regrouping. Should have popped some smoke though.
While our first game was fun this time it was an entirely different level and we both had a great time! I'm sure there are different ways to bend and exploit the system, but playing as it's "meant to be played" is a lot of fun. If I want a more cerebral game I'll go for Infinity but this has a very nice balance of larger army scale game, quick play time and decent tactical depth. In fact as soon as I got home I ordered a whole bunch of SSU stuff. So I guess the answer to To Dust or Not to Dust is a wholehearted Yes!


Thanks for the write-up!
ReplyDeleteBut I've got a question about the rulebook. Does it only contain rules with a brief bit of introduction and a few pretty pictures or does it have good background and artwork? I'm not quite sure about the game yet and if the latter is the case, it's not a complete loss even if I don't like it :)
Thanks Aeria_Gloris, it was fun to put it together (although I kept mixing up what happened in which turn!). :)
ReplyDeleteThe book has a nice chunk of background to work with, basically lining out history since the assassination of Adolf Hitler up until 1947 when the tame takes place. The artwork is of high quality (it's Paolo Parente after all) and the whole book have a nice dossier feel to it complete with faux photo clippings and folder tabs. Overall very well produced. If you're unsure about it you could always get the PDF version for half the price.
Let me know if you have any other questions!
This comment has been removed by the author.
ReplyDeleteHmm, turns out the gf was still logged in.. Let's try that again :p
ReplyDeleteI wouldn't have guessed it if you hadn't told me :)
And thank you for the information! I'm a bit in doubt at the moment. I love the setting and the walkers, but I'm not sure about the infantry. So I might order the rulebook and a box of infantry to have a look. If I like it, do you think the Dust: Tactics box is a good place to start or would it be better to just buy the units separatly?
Hehe! Girlfriends... sneaky ones!
ReplyDeleteThe infantry varies I think. The Axis are overall very nice looking while the Americans are fine but not quite as inspired designs. They're certainly not bad, but currently the Allies infantry are my least favourite. I've ordered a bunch of SSu so you'll see a review of them at this blog soon. :)
The Revised Core Box is a good start I think, especially as it contains a couple of units that you can't buy separately (yet). If you're interest in getting two armies to show the game to other people it's a great start.
Again, thank you for the information! I'm looking forward to seeing the SSU review ;)
ReplyDeleteLove the battle report! Keep it coming and do check out my blog too as I've been bitten by Dust mites recently too!
ReplyDeleteHey erngie! Glad you like the blog. :)
ReplyDeleteIt's really a fun little game they cooked up, and it's interesting being back in an army scale game again. It's probably been like 10 years since last time (GW).
Will have a look at your blog!